# Listing Editor
The content for the listing can be created in the Listing Editor tab.
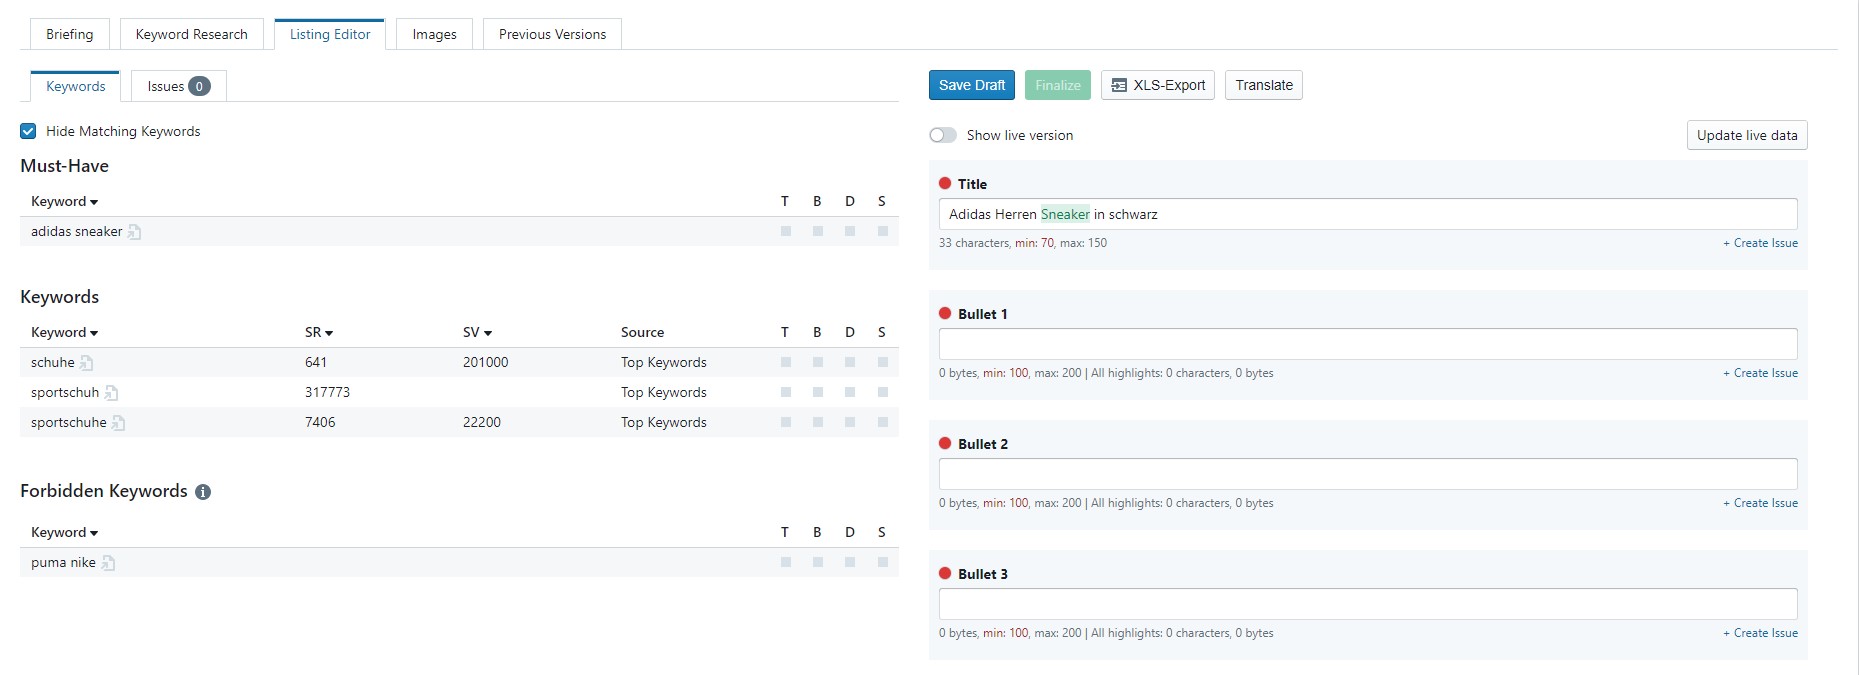
On the left side of the editor, the Must-Have-Keywords from the briefing are displayed first, and below them all keywords from the saved keyword list that were previously marked as useful are shown. It does not matter whether a keyword source was previously activated or deactivated. Finally, the keywords of the blacklist are displayed, i.e. keywords that must not be included in the listing.
To the right of the keywords, rectangular fields with the abbreviations T B D S (Title, Bullets, Description, Search Terms) indicate in which content area the respective keyword was used.
Immediate placement of individual keywords
By clicking on one of the boxes, the keyword is added to the corresponding field.
You can tick the Hide Matching Keywords box to hide keywords as soon as they have been used in the content area. This way you always keep track of which keywords have not yet been used.
On the right is the actual content area, where the text for the product listing is formulated. Here you can formulate the title, the bullet points, the product description, the hidden keywords and possible additional fields (if created). Each keyword used from the keyword list is marked in green. If keywords from the blacklist are used, they will be marked red.
Below each input field, the character length or bytes are displayed in order to comply with the Amazon style guides. Here, the specifications of the Listing Rules are also taken into account accordingly.
When formulating the product description, you can also include HTML formatting. To do this, mark the desired text passage and click on one of the symbols above the input field. The HTML formatting is taken into account when counting the bytes.
Click on Save Draft to save the current version.
With the button Finalize you have the possibility to finish editing the current version. If you then make changes again after clicking on Finalize, a new version is created.
With a click on XLS-Export you will receive a corresponding export file with the contents of this listing.
If you need more than 5 Bulletpoints, an optional 6th bulletpoint will appear after the 5th bulletpoint has been filled.
If you have stored further input fields, e.g. for A+ content, when creating the project, these will now appear under the bullet points.
Changes
If you are in the Listing Editor and make changes to your listing, you can undo them with the key combination 'Ctrl+Z' (Windows) or 'Cmd+Z' (MacOS).
# Get live data
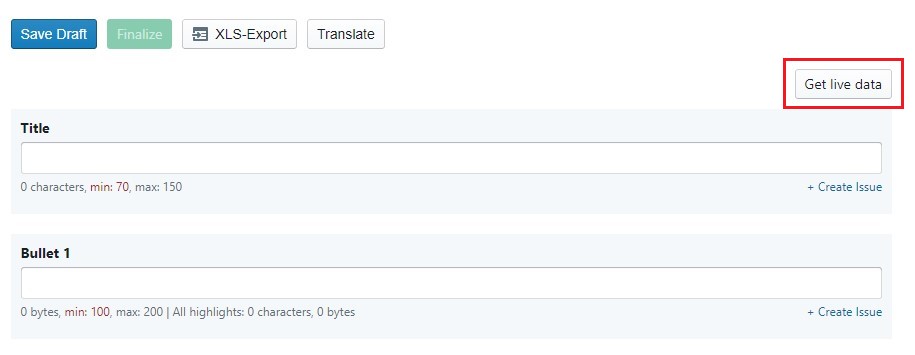
By clicking on the Get live data button you are able to download the current live version of the listing.
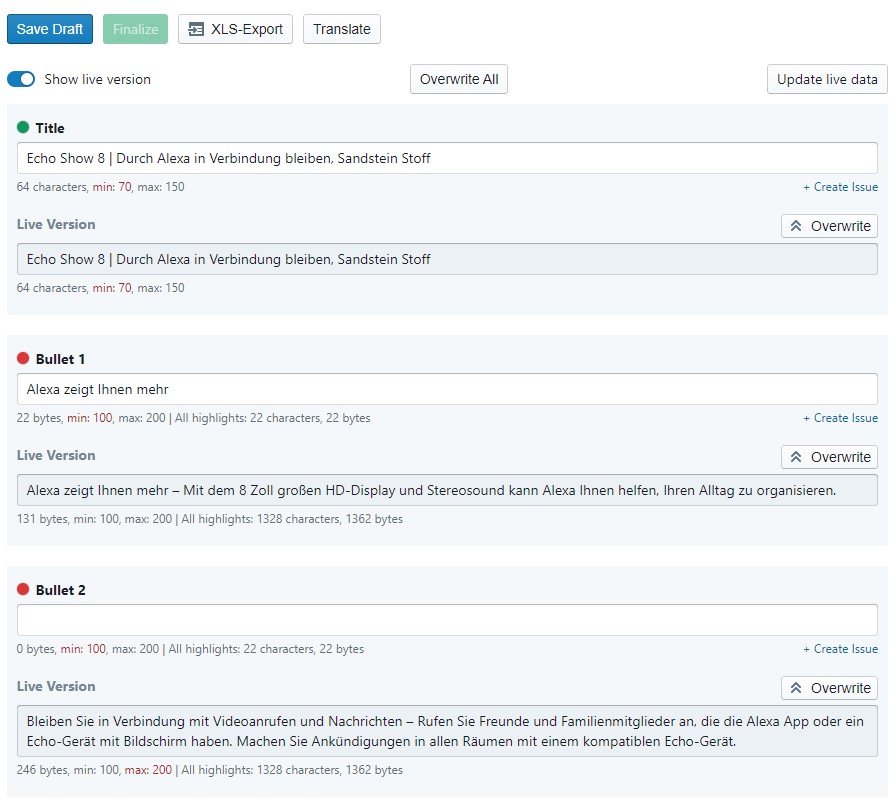
By clicking on Show live version the current listing texts will appear under the text fields to be edited. You have the option of switching this function on or off, as you wish. A red or green dot will appear above each text field. A red dot means that there are differences between the live version and the new version and a green dot means that the live version and the new version are identical. The differences can be viewed by clicking on the dot. You also have the option to take over the live version by clicking Overwrite or Overwrite All. This simplifies the editing of an existing listing.
In addition, you can download the current images and they will be displayed next to the listing editor in the Images tab.
# Feedback and Issues
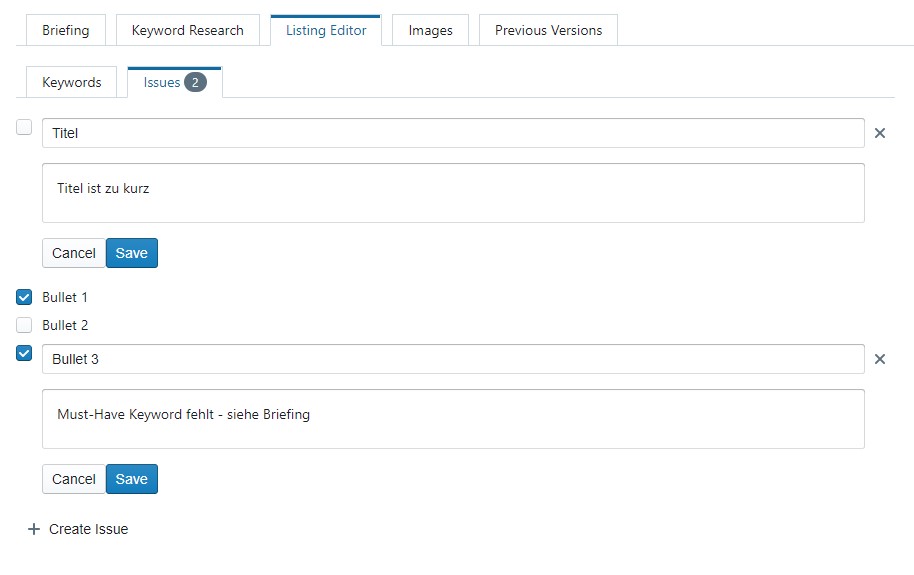
In order to leave feedback for your optimisers, you have the option of leaving appropriate comments or tasks under the item Issues. In this way, tasks can be set for quality assurance of the optimisation or customer feedback, which are to be completed by the optimiser. By clicking on Issues you can create such a task. The optimiser can then solve these tasks accordingly and mark them as completed.
With the click on + Create Issue you can create an issue. First, assign a title to the issue you want to leave for your optimiser, for example Title or Bullet 1. When the optimiser clicks on the heading, a text box opens with the message you left. For example, it could say 'Title is too short, must-have keyword is missing**. The optimiser can then improve the note in the listing and mark it as Done with a blue tick.
# Translate listings
With the Translate button, a created Amazon listing can be automatically translated into another language. To do this, it is advisable to copy an already created listing under Listings, change the marketplace and then translate it.
The following languages are currently offered:
- German
- English
- Dutch
- French
- Italian
- Spanish
- Portuguese
- Polish
- Russian
# Images
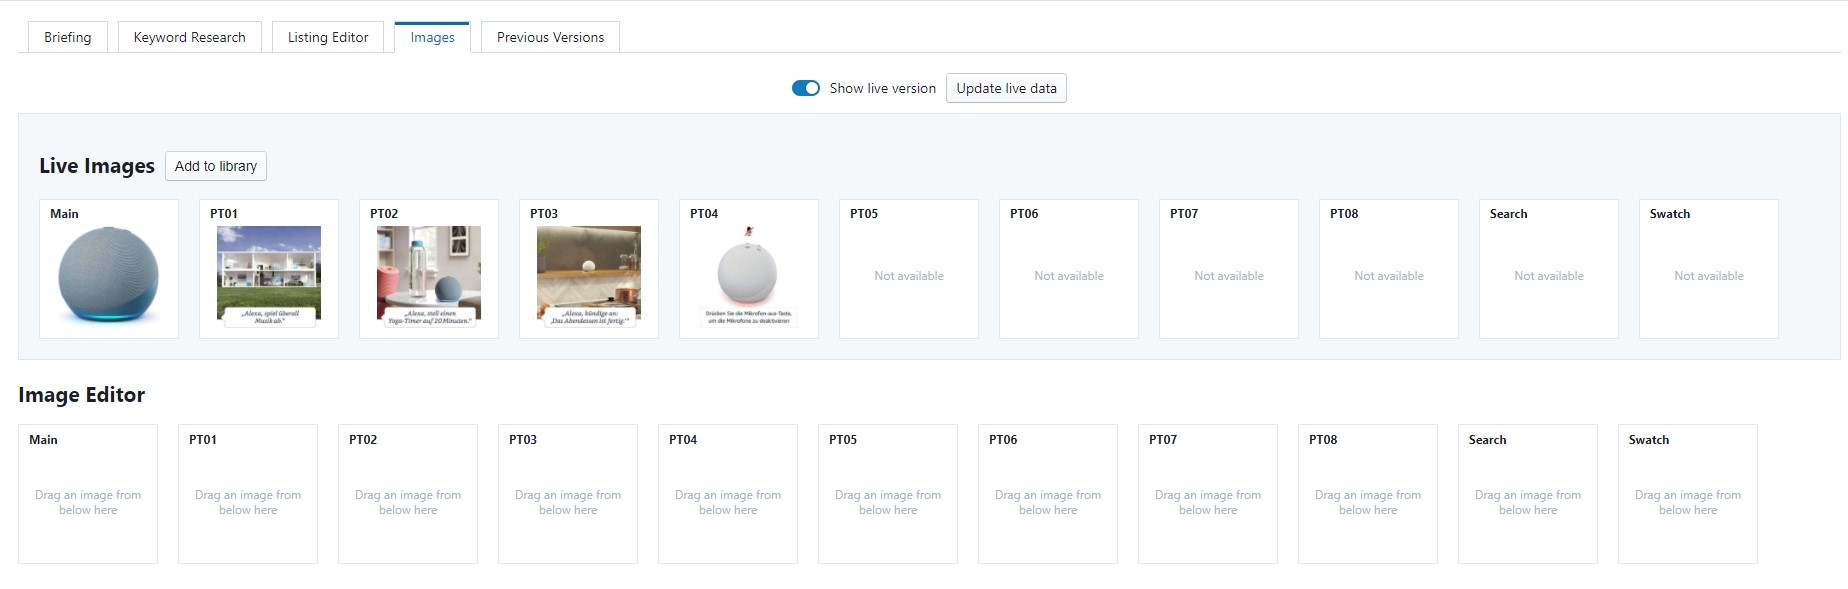
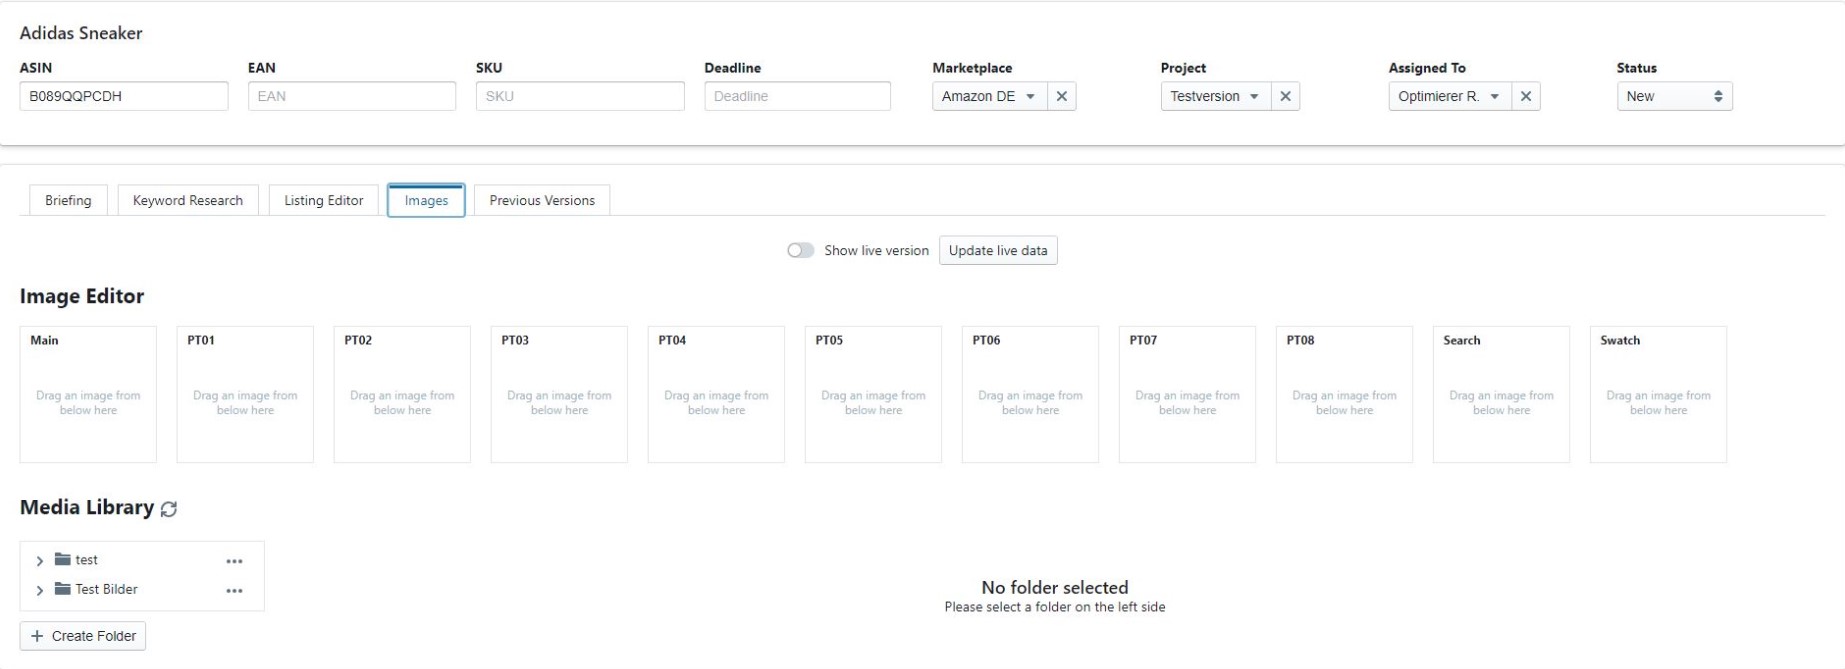
Next to the Listing Editor is the Images section. Here you can add images to your listing as well as view and exchange existing images that are currently live on Amazon.
# Adding images
To add images to a listing, you must first create a folder in the Media Library. To do this, click on the + Create Folder button. Now you can give your folder a name and then add images by drag & drop or click. By clicking on the three dots next to your folders, you have the option to rename a folder, delete it or add another folder. Using drag & drop you can then insert the images from the folders into the designated image templates of the Image Editor and change the order at any time. You have the option of customising one main image, eight additional images and one search and swatch image.
The search image is the image displayed in the search results for the product you are looking for.

The Swatch image is the preview image of the variant design (e.g. the colour of the product)

By clicking on the cross at the top right of the image (in the Image Editor), you can remove an image from the listing. However, it remains in the Media Library. Here you can delete images by clicking on the recycle bin under the respective image. If the listing has not been edited for a while and there are changes to the live version, you can update the live data by clicking on Update live data.
View and edit existing images: With a click on Show live version you can load the images currently visible on Amazon for the respective ASIN. These will then appear above the Image Editor. You can load these images into a folder in your media library using Add to library.

Publish images: When you publish a listing on Amazon (Publish) you have the option to upload either only the listing, only the images or both together.